Check out all my photos here in one place!

Sunday, November 20, 2011

3-D Advent Calendar

This project has kept me busy!  You see, I meet each month with a fun bunch of ladies....my Stamp Club.  For this holiday season, I wanted to have them create something really different....we usually do cards and/or small 3-D projects.  This year, we created this Advent Calendar. 

Although I used as much as I could from Stampin'Up!, there really isn't much here.  SU really does offer many fabulous products....but, in my continued effort to use much of my "stash," this is what I came up with.  The focal point (inside) background of this calendar, was with 1 piece of scrapbook paper that I found in a store (non SU).  Since I needed quite a few of this particular design, it was the way for me to go! 

The Letter to Santa was computer generated on River Rock Cardstock, sponged and distressed.  The embossing folder used was a non-SU, but it just works perfectly for that little "letter," don't you think? 

This calendar came completely flat and needed to be totally assembled...we used Multi-Purpose Liquid Glue (Item #110755)....GREAT stuff!  The drawers are made of chipboard and also were flat....so they needed to be painted inside and on the base and wrapped with paper.  The numbers are also chipboard and were painted and added with Mini Glue Dots.  All paper was added using the fabulous SU Glue Sticks....not sure what makes them so special, other than the shape, but they really are the best and worked perfectly for this project!  All DSP was applied using our Glue Sticks.

I had loads of fun designing this project and all the ladies loved it.....and now we each have this wonderful keepsake to share with our families for years to come.  It did involve quite a bit of time, but was so worth the effort!

Thanks for stopping by today!

Note:  No supplies listed, as much is non-SU or has been retired.  If you have any questions, please feel free to contact me.


Tuesday, November 15, 2011

It's Beginning to Look a Little Like Christmas!

OK....I'm back!  First a power outage then no computer!  Life has certainly been crazy lately......and I've been really wanting to share this one with you.  I am happy with the way this one came out....I made this last month for a small shoe box swap that I participated in.

As you can see, I've used the new-this-year-set, Merry and Type.  Truthfully, this set didn't catch my eye until I saw some really, really wonderfully beautiful samples with it!  It's a fabulous set!!  For this version, the stamped image was embossed using Cherry Cobbler Embossing Powder over Versamark.  The white areas on the ornaments was "colored in" using the new Dazzling Details.  This stuff is so cool....it dries surprisingly quickly and is a bit more subtle than Dazzling Diamonds Glitter, but oh, so pretty!....you can find it in the Holiday Mini and it's really an inexpensive "must have" to add to your card creations.   Oh, and the extra little touch of the Basic Rhinestone in the center of the middle ornament just sets everything off, don't you think?!

Stamps:  Merry and Type
Inks:  Versamark
CS:  Whisper White, Crumb Cake, Cherry Cobbler
Big Shot:  Perfect Details Texturz Plate
Misc:  White Gel Pen, Cherry Cobbler EP, Dazzling Details, Basic Rhinestones, Scallop Trim Border Punch

Thanks so much for stopping by and visiting today! 


Sunday, November 6, 2011

Christmas is Coming!

The Christmas season is almost here!  Are you ready?  I know that I certainly am not.....not even close.  BUT, I am trying to come up with my Christmas card design.  It's certainly time, don't you think?   It's another card (as promised in my last post!) in Wild Wasabi and Cherry Cobbler.  I just love this color combination!!

Actually, this is a sample of a recent swap I participated in last month.  It wasn't a large one....this time, I only needed 11 of them....easy!  Lots of little details....and steps....

As you can see, I used the wonderful Snowburst Embossing Folder.  Over top, is a piece of Cherry Cobbler cardstock that was embossed with one of the new Designer Frame embossing folders (it's a set of two).  I really enjoy using this embossing folder....it works perfectly with the Wide Oval Punch, which is how the white oval was created for the inside.   No need to cut out an oval....Stampin'Up! has made it easy for us....the Whisper White oval was simply punched from a scrap.  This really sets off the punched stocking that is the focal point.  The Stitched Stocking stamp set and Stocking Builder Punch (both from the Holiday Mini Catalog) made the creation of this stocking so easy!  And check out the sparkly toe and heal....from Silver Glimmer Paper, also from the Holiday Mini.  Add in a bit of Cherry Cobbler Baker's Twine and a Basic Rhinestone....and of course, a greeting and it's complete!

Stamps:  Stitched Stockings, Petite Pairs
Inks:  Cherry Cobbler, Wild Wasabi
CS:  Whisper White, Cherry Cobbler, Wild Wasabi, Silver Glimmer Paper
Big Shot:  Snowburst EF, Designer Frame EF
Punches:  Wide Oval, Word Window, Modern Label, Stocking Builder, Corner Rounder
Misc:  Cherry Cobbler Baker's Twine, Multi-Purpose Adhesive (to adhere bow), Basic Rhinestone

Thanks so much for stopping by today!


Thursday, November 3, 2011

Final Edition of My GoDiva Swap

WOW!  New Jersey weather has always been unpredictable, but this last week we had an unprecedented snowstorm on October 29.  We only had about 6 inches of that really heavy-wet-type snow, but not far from here they had a foot or more.  The biggest problem with the snow was that many of our trees have yet to loose their leaves!  Seeing the ground covered with snow and the trees above the snow with still-green leaves was quite the site!

So, the result of the heavy snow and all the leaves still on their branches was way to much weight for the trees to bare, so limbs...and trees!....came crashing down everywhere!  Meaning, that many wires came down with the branches.  So, we, along with so, so many of our neighbors, had no power for a few days!  Some neighborhoods looked like war zones.  Having no electric or heat....and of course, no internet!,  for a few days sure makes you appreciate some of the little things in life!  You haven't lived until you've cooked had to cook a meatloaf on your gas grill!  LOL  But, slowly, things are returning to normal around here....but all those broken trees will be around to remind us of this last storm for a very long time! 

Now that my power is back, I can freely use my computer (was conserving the battery on my laptop for emergencies!), and post my final Go Diva Swap from last month.  I must have been in a red and green mood, because if you notice, that is what my last post, this post, and even the next one (coming soon!) all were made of!  This card is a fairly simple, basic layout, all dressed up.....

The Whisper White background layer was impressed with that wonderful, new Snowburst Embossing Folder and layered onto Wild Wasabi....it's a definite must add to your collection item!  Across the center is a layer of Wild Wasabi that was cut with the fabulous Lace Ribbon Border Punch....but what really sets it all off is that scrumptious Cherry Cobbler Quilted Ribbon that lays across the border!....doesn't that ribbon just make this card looks so amazing?!!   The focal centerpiece layers are on Dimensionals and check out that little Basic Rhinestone in place of the dot over the "i" in King.  I am really happy with this card, even if it isn't clever and innovative!  Instead, maybe it's a bit classy and traditional?

Stamps:  The Sounding Joy
Inks:  Cherry Cobbler, Wild Wasabi
CS:  Whisper White, Cherry Cobbler, Wild Wasabi
Big Shot:  Snowburst EF
Misc:  Dimensionals, Basic Rhinestones, Lace Ribbon Border Punch, Cherry Cobbler Quilted Ribbon, Stamp-a-ma-jig (It's a MUST for proper placement of these 2 stamps!!)

Thanks so much for stopping by today and visiting!


Saturday, October 29, 2011

Another Almost GoDiva Swap

Are you ready for Fall?  I am....it's my favorite season!....Unfortunately, I think we're pretty much skipping that around here......seems we're in for a Nor'easter and if all the predictions are right, at least 6" of snow tomorrow!  Here in northern NJ, I don't EVER remember getting any substantial amount of snow before Halloween!  

So, with snow on its way, this card definitely seems appropriate....and this is another of my recent, almost GoDiva swaps.  Truthfully, this one is my favorite, but I found I didn't have enough Basic Rhinestones to complete 30 of these....and without the rhinestones, it just didn't have the same pizazz!  Gotta have some bling!  And those bows would have taken a lot of time....as lovely and luscious as that quilted ribbon is, it's a bit of a bear to tie nicely and neatly into compact little bows!  But, OH, it's just so pretty....and adds a touch of class to just about any card you add it to!

What do you think?  Isn't this set lovely?  I just love the scroll-y type greetings that come with this set.  Gorgeous!!  Remember, this is a current Holiday Mini set...only available for a short time!

Stamps:  The Sounding Joy
Inks:  Wild Wasabi, Cherry Cobbler
CS:  Whisper White, Wild Wasabi, Cherry Cobbler
Big Shot:  Northern Flurry EF
Misc:  Dimensionals, Basic Rhinestones, Cherry Cobbler Quilted Satin Ribbon

Thanks so much for stopping by today!!

Wednesday, October 26, 2011

A Holiday Swap....Almost!

Oh!  My goodness....where has the time gone?!  It seems like just a short time ago I made my last post.....but it was a few weeks ago!  Thank you so much for your patience.  I HAVE been stamping....I just haven't had time to post!  So...in an effort to remedy that, here's my first of a few posts.....

This card was actually a sample I made up for a recent swap.  It wasn't my final sample, but I still kinda like it.  Non-traditional colors....I love the unexpected, don't you?  This wonderful set, The Sounding Joy, is available now from the Holiday Mini.  It's just so pretty!....and to me, it speaks of what Christmas really is about. 

So, the background words, which are really the real words to "Joy to the World," were stamped in Baja Breeze onto a circle of Whisper White....the circle was created with the Big Shot and the Clear Circle die.  As you can see, it was then stamped over top with the greeting, also from the same set, and embossed with Cherry Cobbler Embossing Powder....that stuff is just so pretty!  And can you see the Large Snowflake peaking out?  Also created with the Big Shot.  This was all highlighted with those awesome Basic Rhinestones (can you tell that I just love them?!!).  And the impressed background was made using the fabulous new Snow Burst Embossing Folder.   It's kind of like the Square Lattice EF in a way....the cardstock takes on this wonderfully supple feel after a spin through the Big Shot; it truly changes the texture of the cardstock.  But as you can plainly see, only a portion of the Baja Breeze layer was impressed.

This was all set off with my favorite ribbon....White Taffeta and a touch of the Cherry Cobbler & White Baker's Twine and topped with another Basic Rhinestone.  This card is pretty....in large part because of that beautiful set, but, it just didn't "send me!"  So, after creating this, I was back to the drawing board!  Please come back tomorrow and see my next pre-swap sample.

Stamps:  The Sounding Joy
Inks:  Baja Breeze, Versamark
CS:  Cherry Cobbler, Baja Breeze, Whisper White
Big Shot:  Clear Circle Die, Snowflake Die, Snow Burst EF
Misc:  White Taffeta Ribbon, Cherry Cobbler Baker's Twine, Basic Rhinestones

Thanks so much for stopping by and visiting today!


Friday, October 14, 2011

A Little Pink Duck

Remember that last little duckie card?....the one that was a Baby Challenge card, but turned out to be a perfect for a little boy?  Only problem with that was that I needed a card for a new little baby GIRL!  So, this is what I finally came up with! 

Basically, the duck in the center of this card was created the same as the duck from the boy card, but then I needed to add in some frilly things.....and make it pink!!  I think the pink duck works, don't you?!!  This is a real girly-girl card. 

Here's how I made it:
(Some non-SU stuff here, as well as some retired SU!)
-There's a layer of impressed cardstock layered over the same color card base.
-The white strip was punched on both top and bottom.
-The little holes were covered by the tiniest Basic Pearls, which were colored using one of my Copic Markers.
-The little duckie was colored in using the same Copic Marker.
-The hat and umbrella were "colored in" using Dazzling Diamonds.
-The beak and polka dots were colored in using my old Pixie Pink marker.

Sure hope the new Mom likes this little card!

Stamps: Easy Events, Short & Sweet
Inks:  Basic Black
CS:  Mauve Mist*, Whisper White
Big Shot:  Non-SU Embossing Folder, Circles Die
Misc:  Copic Markers, Modern Label Punch, Pink Gingham Ribbon*, 1 3/4" Circle Punch, 2 3/8" Scallop Punch, Basic Pearls, Martha Stewart Border Punch, Dimensionals, Pixie Pink Marker*
*Retired SU (Remember I'm trying to use up some of the many things I have in my stash that are no longer current!!)

Thanks for stopping by today!  (Sorry it's been so long...I've missed you!)

Tuesday, September 27, 2011

More from Toni

Here's another of Toni's Stamp Camp projects that I made last week while visiting (and helping!).  This one is just so cute....and I don't think that the photo really does it justice! (You can read more about my visit here and you'll see another of the projects, too!)

Toni had everything prepared for this one.  She used the wonderful Fancy Favor Die and cut it out using textured Crumb Cake.  Then the curvy top was trimmed off.  And I don't know anyone else who has mastered the Direct-to-Paper (DTP) technique quite like Toni....she is definitely the Queen in my book!  You can see this basket has a 2-tone look....Toni used Crumb Cake ink and colored it using the DTP technique.  That textured cardstock really looks amazing with this technique! 

She also slit the basket from the top down to allow for the weaving.  For the weaving, we simply did basic weaving with strips of Crumb Cake CS.  That's it!  Each portion was adhered at the top with Sticky Strip....or you could use Mini Glue Dots, which is what I used.

The handle....well, it was simply adhered using 2 Gold Brads on each side....Toni also did DTP on that strip as well!

The second photo shows the close up of the little tag (you can click on it to make it a little larger).  This set really didn't do a thing for me when I saw it in the Holiday Mini....it's called Gift Givers and each stamp image coordinates with one of our punches.  I think I've fallin in love with it after this project....it's just so stinkin' cute!!  As you can see, this turkey image works with the Curly Label Punch.  (One lady at Toni's class liked the set so much she purchased it AND every single punch that coordinates with it!!  WOW!)  On our basket, we simply colored in the image with markers.   The second photo gives a better close up of all the details.  This was really fun....can't you just see it on your Thanksgiving table?!!

Stamps:  Gift Givers
Inks:  Early Espresso, Crumb Cake
CS:  Early Espresso, Very Vanilla, Crumb Cake -- textured AND smooth
Big Shot:  Fancy Favor Die Mover & Shaper (Curly Label shape)
Markers:  Soft Suede, Chocolate Chip, More Mustard, Pumpkin Pie, Old Olive, Riding Hood Red
Misc:  Dimensionals, Gold Brads, Sticky Strip, Mini Glue Dots, Curly Label Punch 

Thanks so much for stopping by and visiting today!

Saturday, September 24, 2011

Just for Baby

You've heard me say that I've been a member of various online stamping groups.  One of them sends out Challenges each week, and although I really don't participate too often, I do try whenever I can.  Recently, there was a baby card challenge.  Well, I need a baby card....the daughter of a good friend of mine had a baby girl.  So, I thought this would be a GOOD thing to participate in!

Well, as much fun as I had making the card....it did NOT turn into a baby girl card!  I LOVE blue and yellow together...
yellow and pink, well, not so much!  So, that's how this evolved into what it is.  And it's just so cute, don't you think?!!  Baby cards are sweet and such fun to make...after all, new babies are sweet and fun, too!

As with many of my cards, this is a basic, classic layout....all dressed up with lots of details.  One of my favorite new things is to make the base of the card a color (in this case Bashful Blue) with a impressed layer in the same color over top....that way, the inside of the card has a nice clean look to it.  The corners are all rounded.  And that cute little duckie?...well, it's from the new Easy Events, a set we all received at Convention in July.  Here's he's paper-pieced....in other words, I stamped him 3 times:  1 time on the Whisper White background paper, 1 time on Daffodil Delight, and finally a last time on Bashful Blue.  Then I cut out the body of the duck stamped in Daffodil Delight, and the umbrella top out of Bashful Blue and layered them both onto the white stamped background.  The little sailor hat and the dots in the umbrella are "colored" in with Dazzling Diamonds Glitter, which also outlines the waves.  The duck bill was simply colored by using my Pumpkin Pie marker.  And one of those cute little tiny Mini Brads (the new ones) was used for his eye. 

The plaid background was a technique we learned at Convention....you can't see it on screen, but there's a lot of texture going on here.  I inked up my new Stripes EF and put it through the Big Shot....then re-inked it and put the same paper back in but turning it 90 degrees first.  Cool?!!...Huh?!!

Since there was so much going on, the saying is not layered, but the outlined letter and brackets were colored in with my Bashful Blue marker.  Oh, and check out the inside....a plain and simple inside just wouldn't do!  My Challenge Partner should be receiving this in the mail in today or maybe Monday....sure hope she likes it!

And as an added bonus, this card qualifies for the Challenge over at Hand-Stamped Sentiments.  There's some fabulous entries this week!  Be sure to check them out.

Stamps:  Easy Events, Word Play, Full of Life
Inks:  Basic Black, Bashful Blue, Basic Gray (for greeting inside), Daffodil Yellow (inside card)
CS:  Whisper White, Daffodil Delight, Bashful Blue
Punches:  Corner Rounder, Extra Large Oval, Scallop Border (inside card), 1 3/4" Circle, 2 3/8" Scallop
Big Shot:  Perfect Polka Dots EF, Stripes EF, Circles (used for the Daffodil Delight circle layer), Scallop Squares Duo
Misc:  Bashful Blue Grosgrin Ribbon, White Baker's Twine, Silver Mini Brad, Paper Piercer (to make hole), Pumkin Pie Marker, Bashful Blue Marker, Mini Glue Dots (to hold bow on)

Thanks so much for stopping by today!!


Friday, September 23, 2011

Stampin' with Friends

Did I ever tell you that the BEST part of being a Stampin'Up! demonstrator is the friends you make along the way?  I've met...and stamped....with people from all walks of life, from all over the country. SU has given me the opportunity to make friends with those that have been/are customers, as well as sister demonstrators...people I would never have met any other way!

So, why am I sharing this?  Well, last week, I traveled down to my son and daughter-in-law's new home.  You see, I have a bit of time off while the store I work in is being renovated (compliments of flooding caused by Hurricane Irene!) and my son began a new job this past Tuesday, but had some time off in between jobs.  So, down to Virginia I went!  I got to see his home all settled for the first time....they did a great job and it looks like it's going to be a very happy home.

I went down last Wednesday and Dan (my son) and I had a few projects and visited all of Thursday and Friday.  But when Saturday came along, I figured it was time for me to get out of their hair and give my DIL a bit of time to herself....so I visited with my friend and sister demo, Toni Tessler, who lives about an hour away.  Toni was hosting a Stamp Camp, and I told her I would come and help.  In return, she had all the projects ready for me to make as well.  Cute ideas!  AND I, of course, had some time to visit after everyone left and all was quiet.  Oh...and at the end of the day, I visited with another sister demo/friend, Jeannette!  See?  It really IS great to be a SU Demo!  (Want to join in the fun?  Contact me and see how.)

This photo here is one of the projects I helped with.  This adorable idea was featured at Convention this past July, and Toni adapted and redesigned it to fit a Fall theme.  The box itself is the Box #2 Bigz Die and then the box is "wrapped" with a piece of textured Cajun Craze CS and some of that wonderful Wide Grosgrain in Old Olive....only Toni didn't realize that the Old Olive has been retired.  But things could easily be changed out to what is currently available in the catalog.  The Triple Treat Flower is used on the front....don't you just love it?!!....remember, it's one of those single stamps available for purchase.  It was inked in Old Olive and then stamped off lightly once before stamping on the Natural Ivory CS.  And the best part?  The saying....Toni took the Bright Blessings Jumbo Wheel and peeled the rubber off of the hard plastic wheel...then cut it apart to use all the different sayings and images as separate stamps.  Ingenious!!  They each work marvelously well with our clear blocks.  Wouldn't this make a fabulous little treat box at your Thanksgiving table?!!

Here's the recipe:

Stamps:  Triple Treat Flower, Bright Blessings Jumbo Wheel
Inks:  Old Olive, Cajun Craze
CS:  Old Olive, Natural Ivory, Cajun Craze, Cajun Craze Textured
Big Shot:  Box #2 Bigz Die
Punches:  1 1/4" Round, 5-Petal Flower, 2 3/8" Scallop Circle
Misc:  Sticky Strip (to hold everything together!), 1 1/4" Striped Wide Grosgrain in Old Olive (retired), Dimensionals

Thanks for stopping by and visiting today!


Sunday, September 11, 2011

Tuesday, September 6, 2011

It's a Blue Jeans Kind of Day!

Remember I attended the SU Convention in July? Well, I came home with at least a year's worth of ideas....and this was one of them! I landed in Salt Lake City about 4:30 and by 6:00 I was in the Convention center...things were in full swing! That first night, there were a lot of demonstrations and this little card is from one of them.

See the blue jeans? They were created by simply folding a piece of our new Denim Jean Ribbon in half and adding a new little Mini Brads....OK, we've had "Mini" Brads for a few years, but now all of those are simply called Brads.....they are 3/16" in diameter and come in a lot of different fabulous, coordinating colors. I use them all the time...they are definitely one of my very favorite accessories!.....LOVE them!

Well, these are the NEW Mini Brads (Item #122941 @ $5.50 for 100; Page 199)....and they are truly MINI!! At only 1/8", they are are just too stinkin' cute and so easy to use. The "legs" are easy to manipulate and bend in different directions, which was needed for these blue jeans. As you can see, the "jeans" are hanging on a clothes line (created with some White Baker's Twine) and those fun, new Mini Clothespins (Item #122042 @ $2.95 for 24). The background on this card was created with the classic Lovely as a Tree....so happy that set is still in the catalog! It's such a GREAT set for so many things!  Think Christmas, masculine, birthday.........

This was one of my favorite ideas from Convention (although there were lots of favorites!)....so simple, but so fun and creative! Gotta love that! So, last week when a few of us demonstrators got together, those of us who attended Convention gave a little demo on some of the ideas and tips we saw. This was just one of my "shares." So, now, I just wanted to share this fun little idea with you!

Stamps: Lovely as a Tree, Teeny Tiny Wishes
Inks: Early Espresso
CS: Crumb Cake, Early Espresso
Misc: Blue Jean Denim Ribbon, Mini Brads, Mini Clothes Pins, Mini Glue Dots, White Baker's Twine, Crop-a-Dile (for making the holes for the "clothes line"), Modern Label Punch, Word Window Punch

Thanks so much for stopping by today!!

Posted by Picasa

Sunday, September 4, 2011

A Late Birthday Card

One of my nephews recently had a birthday and of all my nieces and nephews, he's one of the few that really looks forward to the cards I send to see what I've created for him.  To be honest, the actual day of his birthday kind of slipped right by me (my bad!!).....so, this is a belated birthday card.

I wanted something masculine, of course....he just turned 20, and I wanted something easy to mail and something that was quick and easy.....after all buttons and bows really aren't going to impress him!  This sample features all retired items (except for the cardstock)!

Both the retired Large and Small Star Punches were used to create the stars and laid out onto a piece of Natural White CS.  When each of the stars were adhered, it was run through my Big Shot with the Square Lattice Embossing Folder.  (He's gonna think this is so cool!)  The Happy Birthday image in the center is from the now-retired Engraved Greeting....it's such a perfect set for simple, masculine cards, so I just couldn't give it up! The finishing touch is the simple piece of ribbon in matching Riding Hood Red (long retired) that goes across the card.

Hope he likes it!

Stamps:  Engraved Greeting*
Inks:  Riding Hood Red
CS:  Crumb Cake, Marina Mist, Riding Hood Red, More Mustard, Natural White
Big Shot:  Square Lattice EF
Misc:  Large & Small Star Punches*, Corner Rounder* (used older, retired version), Riding Hood Red Taffeta Ribbon*, Dimensionals
*Retired

Thanks so much for stopping by today!

Wednesday, August 31, 2011

Color Challenge....A Lot Late!

Hurricane Irene came and went....fortunately, here at my house, other than some yard clean up....mainly just leaves and small branches...we came out unharmed, we didn't even loose our power.  We were very, very fortunate, while many in our area were not.  There are many rivers in NJ, and it seemed that every one of them caused flooding.  Where I work, which is less than 10 minutes from my home....well, there was 2 feet of water in the store and in the entire downtown business area....no telling when we'll reopen.  Driving around right now is an adventure since so many roads, even major highways, were either washed away or closed due to flooding.  President Obama  is supposed to visit the area tomorrow to view the damage.  Irene certainly left her mark here.  So, when you see some of the devastation on the news...it truly is not an exaggeration.  They say this was a 100 year flood....I've lived in NJ all my life, I've never seen such destruction that has been so widespread as this has been.  Last week certainly was interesting....an earthquake AND a hurricane all in one week!  WOW!

Well, you know now that I'm fine....but, you came to see a card.  This is WAAAAYYY late! A few weeks ago, there was a Blogger's Challenge that was a color challenge....they are one of my favorite challenges! The colors were in the form of color dots and on my screen, the colors I used in this card matched....but I'm not sure if this is what they actually were!

Anyway, I didn't get the chance to share back when this was a Challenge, (don't remember why...sorry!!) but thought I'd share it now, 'cause I really like the way this card came out. This set, Easy Events, is one of the sets we received at Convention in July. What a GREAT set it is!! I'm sure this is going to be a great, all-purpose set.

For this card, as you can see, the flowers were stamped repeatedly across a piece of Natural Ivory and colored in with markers. The centers of each flower was dotted with my White Gel Pen, but everything looked blurry and murky, so I added in the simple Basic Pearls in each center....that's just what it needed! How cute, right?!!

This was a simple and easy card with some really fun elements.....the Basic Pearls, which I already mentioned; the Perfect Polka Dots in the background, and the fabulous new Lace Ribbon Border Punch with the Marina Mist Ribbon woven through. Oh, and that saying is just the perfect finishing touch...IMHO!....which is from the fun, new Hostess set, Happiest Birthday Wishes.

Stamps: Easy Events, Happiest Birthday Wishes
Inks: Basic Black
CS: Natural Ivory, Crumb Cake, Baja Breeze, Wisteria Wonder
Big Shot: Perfect Polka Dots EF
Misc: Basic Pearls, White Gel Pen, Wisteria Wonder Marker, Pear Pizzazz Marker, Lace Ribbon Border Punch, Marina Mist Ribbon

Thanks so much for stopping by and visiting today!


Posted by Picasa

Saturday, August 27, 2011

Rain, Rain Go Away!

Well, Hurricane Irene is knocking at my door....she's been downgraded to a Category 1, but is bringing lots of rain with her. So, my stamp room is partially packed, everything is up off of the floor and onto my desk top....you see, my stamp room is in the basement. We've had so much rain lately (this has been the 6th wettest August on record!) that with all the rain that Irene is supposed to give us (expecting 7-12 inches tonight!), it's likely that we'll get some water down there. So, no stamping for me!! Sigh! Fortunately, our visitor should be gone by tomorrow afternoon.....definitely an unwelcome visitor!! Hopefully, the aftermath and clean up won't be too awful.

In the meantime, I have a card to share with you! This card was a quick and easy one I made last week...I needed a few thank you, thinking of you, and get well cards. This one was perfect for all those, I just changed out the greeting as needed....this was the first time I used the lovely Flower Garden Embossing Folder. Just a portion of the image was used. To make it stand out a bit more, it was sponged with White Craft Ink and then the centers of each flower was dotted with 2-Way Glue and Dazzling Diamonds Glitter. As you can see, this was paired with the brand-new Houndstooth Embossing Folder in the background. This wonderful new EF is just the perfect size for a card front, but I personally like a nice clean look inside my card....so, this is a layer on layer. Meaning that the embossing is an extra layer on the card base....both in Elegant Eggplant. One of my new favorite color combos is this wonderful color paired with the fabulous new InColor, Wisteria Wonder. Add in just a bit of Whisper White to give it a bit of crispness and set it all off......and it's perfection! Notice that the stamping on this card is minimal.....but, I really do love the finished effect.

Stamps: Petite Pairs
Inks: White Craft, Elegant Eggplant
CS: Whisper White, Elegant Eggplant, Wisteria Wonder
Big Shot: Houndstooth EF, Flower Garden EF
Misc: 2-Way Glue Pen, Dazzling Diamonds Glitter, White Taffeta Ribbon

Thanks so much for stopping by today!
If I don't loose power (and cable) for too long, I'll be back tomorrow with another sample to share.


Posted by Picasa

Card Tins -- Final Post

The last 2 posts have been about these card tins.....they have taken over my life lately....at least most of my spare time!  Remember, there were 6 tins, each with 12 cards and matching envelopes, all hand stamped by me...and then placed in this gift bag.  Whew!  So glad that project is behind me!!  Although I have to admit that I did have fun making and creating all the cards, the tins, and even the gift bags...which I am sharing here. Just happy to move onto other things!

I'm really pleased with the way the bags came out....do you remember this wrapping paper from SU?  It was called Blizzard and is from a few years back...don't remember how far back, though.  There were 2 rolls...the blue with the little dots and the coordinating Chocolate Chip and Bashful Blue snowflake patterned paper.  The very bottom of the paper at the base of the bag was punched with my Scallop Boarder Punch....I think it's difficult to see on screen.  The Chocolate Chip Satin Ribbon is also retired, but there is a newer version now...but I don't have that.  Can't really seem to purchase it with this still sitting in my collection of STUFF!  This ribbon is luscious....I'll be so sad to use up the last of it!  (I'm really giving it a gallent try to reduce my retired supply!)

The cute little tag is mostly new things....the layered circles (created with the 1 3/8" & 1 1/4" Circle Punches and layered onto a punchout from the Snowflake Punch.  Yes, the eyelet....in Bashful Blue (gotta love how everything coordinates!!) IS retired...so is the Silver Cord used to tie it to the bag.  Don't you love it?  So easy to replace this patterned paper with something in YOUR collection....definitely with something current!!  Think background papers......

And here's one last card from the box....it's actually the very last one made for each tin.  Simple and easy, but so cute.  The retired Orchid Opulence was used for the card base, but can easily be changed out for whatever color strikes your fancy.  I have to admit, that I've always loved Whisper White with Orchid Opulence and a touch of Basic Black...which is the color combo for this simple card.  The flowers were simply stamped 3 times and then the stitching was added. 

See the black punch out in the center, above and below the flower strip?  None other than the Decorative Label Punch, which was cut in half and mounted to the back of the flower strip before adding to the card. Once mounted, it still needed a little something, so the little white dots were added with my White Gel Pen, and the BLING was created with Basic Rhinestones (medium size) was added to the center of each flower! 

See?  I told you it was easy to make this one!  Oh, and I need to mention that this was inspired (but not the same) by the fun little sample on Page 98 of the SU catalog.  It was just adapted to what I happen to have in my stamp collection.

Stamps:  Vintage Vogue, Thank You Kindly
Inks:  Orchid Opulence, Basic Black
CS:  Orchid Opulence, Basic Black, Whisper White
Misc:  Basic Rhinestones, Basic Black Marker, White Gel Pen, Decorative Label Punch

Thanks so much for stopping by and visiting today!!


Wednesday, August 24, 2011

Just a Note....

I met with my Stamp Club ladies recently.  We always make 3 projects together....usually 2 are cards and the third is something 3D and simple to make.  This was our 3D project from the other night....it's an "oldie, but a goodie."  They LOVED this idea....THEY didn't know this idea has been around!

With school about to begin (in NJ, we usually begin right around Labor Day), there's lots of things for busy Moms to remember...and in my house, small pads of paper, or Post-It pads seem to develop legs and walk away!  By putting the Post-It pads onto an easel, they tend to stay put and be there when you need them.  It seems these ladies understood that concept perfectly...could it be that my house is not the only home where this phenomenon happens?!!

Can you tell what the easel is?  It's an inexpensive acrylic easel-type 5x7 frame!....it's just turned the opposite direction so that the Post-Its are down and the "stand" is what is giving it elevation....Am I explaining that clearly?

Anyway, the stamp used for the background is a new Al La Carte, single stamp, called Triple Treat Flower. (Item #122909; Page #18)  So fun!  Matches a few of our punches.  The background is Crumb Cake and the flower was stamped in Wild Wasabi.  Then the image was stamped twice more, once in Pool Party onto Whisper White and again in Calypso Coral onto Crumb Cake.  The 5-Petal Flower Punch was used to punch out the Pool Party/Whisper White flower; and the 1/2" Round Punch was used to punch out the little circle flower in the center.  Can you see the little dot of white in the very, very center of each flower?  A fun little touch with the White Gel Pen.

The word, "Notes" was computer generated....I was lucky enough to easily match up the color to the ink!  This was punched out using the Large Oval Punch and layerd onto the framed background.  I'm loving this color combo....on my screen, it just doesn't look nearly as pretty as it does in real life; hope it looks better on yours.

Stamps:  Triple Treat Flower, Four Frames
Inks:  Wild Wasabi, Calyso Coral, Pool Party
CS:  Crumb Cake, Wild Wasabi
Punches:  5-Petal Flower, 1/2" Round Punch, Decorative Label Punch
Misc:  Sticky Strip, White Gel Pen

Thanks so much for stopping by today and visiting!!

Tuesday, August 23, 2011

Here They Are....Card Tins!

As I mentioned yesterday in this post, I've been busy, busy, busy stamping away to create 6 card tins filled with cards....which is why I haven't been posting here lately.  I've been consumed with creating and making these tins and filling them with cards (all created in my spare time around Convention and vacation, of course!).   3 are for an order I received, 2 are for gifts I will give....giving me 1 extra, which I'm sure I'll use with the upcoming holiday season, if not before!

Also mentioned that I've been on a mission to use up some of my rather plentiful stash....I have so much DSP and cardstock that has retired....it's TIME for some to be used!  So, these tins, although almost entirely SU product, much has retired.......in fact, I have so much retired DSP, that I feel guilty taking advantage of the GREAT special SU now has going on.....Buy 3 packages of any Designer Series Paper and receive a 4th package of your choice FREE!  How great is that?!!      Details are here, but this special is only till the end of August.

This tin, I have to say is my favorite...or should I say favorites, since I created doubles.  When I first put on the paper and then added the ribbon, it was really rather drab.  The paper is pretty enough, but really needed some punch!  So, I pulled out some retired Ruby Red CS and that was just what this box needed!  That flower was created with a Big Shot die that is also retired....each layer was sponged, also in Ruby Red, and a Green Round Crystal Brad was added in the center.  The leaves were created using the Large Oval Punch, folding each oval in half, trimming one end to a point, put through the crimper and then sponged.  Oh, and the word, "Cards" was created using a Cuttlebug alphabet that I've had for way longer than I've had my Big Shot! 

Next up is this cute daisy tin.....again, lots of retired stuff here.  And, as you'll notice, the layout is exactly the same....actually, all 6 have the same layout.  It just made life easier to create the same thing with different papers.  I just matched the flowers to the papers, so they are all different.  Here, I simply used the Daisy Die (LOVE it!!), added in a Build A Brad and some leaves created with a non-SU leaf die that I recently purchased off of a clearance rack in a craft store.  Since the letters were each punched using scraps, I found some Bashful Blue scraps that were stamped with the now-retired Sanded Background stamp.  I only make one of this particular design.

Next.....(can you tell I was having fun with all these flowers?!!) is this box with the ruffled flower.  This one is fun and so easy....I learned how to make them from this tutorial, posted by my friend, Lynn.  This box...which, again, I made in duplicate....was really easy.  I've always loved this DSP and was hoarding it....now it's all used up; there is no more!  The flower and letters are in Riding Hood Red; the leaves are in Kiwi Kiss (have just a bit left!).


And this is the last one....the supply of this DSP is now dwindling as well.  For the flower on this one, I used the Fun Flowers Die...but, I have to admit that this is the second flower created for this box.  The first was created with Rose Red and Regal Rose layers and each layer was impressed with various embossing folders.  WAAAY too busy with the background paper, so I simplified by changing 2 of the layers out to Whisper White and lightly sponging the very edges of each petal.  The Regal Rose layer was from the original flower.  I'm so much happier with this color flower!


So....what do you think?  As you can see, I left the tops of each of the tins plain, which I believe works.  Decorating the tops is a time-consuming process, and when left blank, it makes you focus on the box itself.  I really love the way each one of these turned out....so, when I e-mailed photos of the boxes to my customer asking which 3 she wanted, she couldn't decide...she's leaving it up to me!  A difficult decision, to be sure!!

I haven't listed all the supplies for these boxes, as I mentioned above, most have retired, but you could easily switch out any of the papers and/or flowers to fit what YOU have in your own personal collection.  If you have any questions, please drop me a line! 

Oh.....when I was first commissioned to make these boxes, I looked everywhere on the internet and couldn't find these tins anywhere!  Well, yesterday, I rec'd a popular craft magazine and these tins are once more available.  So, if you want to know where you can find them, just ask, and I'll be happy to share that info privately.

Whew!  This was a long post!  Hope this explains why....and makes up for my most recent absence.  As always......


Thanks so much for stopping by and visiting today!

Edited to add:  If you have any questions, please e-mail me so I can get back to you!


Monday, August 22, 2011

Busy Stamping Away......

It's been awhile....where has the time gone?!!  I cannot believe that it's been a few weeks since my last post... BUT, I have some eye candy for you today!

I had an order for some cards.....you see back in late June, I needed a quick thank you gift, so I took some cards out of my stash and threw them in a lunch box tin that I decorated and wrapped it all up really pretty.  Well, she loved it so much she ordered THREE!  Each with 12 cards.  Well, as I said in the title to this article, I've been busy stamping away!!

Well, those tins are no longer available for purchase.....I had two in my stash, but put out a plea to some of my sister demos and found another four, so I bought them all from her.  That gave me six gifts.....so I made six sets.  The outsides are all different....I'll share them soon, but the contents are all the same.  I'm on a mission to use up a lot of my retired stock and some of the stuff in my stash that has been collecting dust for way too long!  So, although I'll give you the information on these samples, much of what I've used has retired.

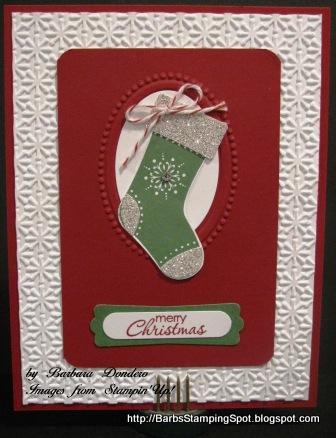
This card on the right is one of the cards in each of the box sets and uses the long-retired Vintage Violet and the matching ribbon.  (You see?....I have stuff from long  ago that really needs to be used!)  Simple layout...the background layer features a Cuttlebug folder that is one of the first I ever purchased....before SU came out with their own. 

The stamps are definitely current SU....the greeting is from one of my favorite word sets, Short & Sweet and punched out with the Word Window Punch.  The focal point image is from Pocket Silhouettes....a set that has been neglected.  This was one of the featured sets at Convention in July....this particular image was a silhouette on the stage.  It really is a great image and I've fallen in love with it all over again!

The little spray of leaves was simply stamped onto a square of Almost Amethyst (remember when that was one of my favorite colors?!!....yup!  Still have some of the cardstock!)  Then graduated squares of Vintage Violet and Whisper White were layered over top, but had the circle punched with the 1 3/4" Circle Punch....these layers were adhered together and then popped up on Dimensionals before being added over the Almost Amethyst layer.  Inside the card, there's a simple layer of Whisper White cardstock, so that a message can be easily added....and read!

Stamps:  Pocket Silhouettes, Short & Sweet
Inks:  Vintage Violet
CS:  Vintage Violet, Almost Amethyst, Whisper White
Misc:  1 3/4" Circle Punch, Vintage Violet Ribbon, Cuttlebug Embossing Folder, Dimensionals

Here's another card that was included.....and probably one of my favorites.  The two I'm sharing today are cards that I've created and are my original ideas, I think.  (They may look similar to others seen online....I do a lot of crusin' around the internet looking at ideas, so they were probably inspired by things I've seen!)  This card has all current SU product.  (What was I thinking?!!)

Element of Style is the set used here, in Chocolate Chip on Very Vanilla...this gives the card such a classic look, don't you think?  The greeting is from the set called Oval All, another neglected set.  The stamp is just the perfect match to those flower branches and added to this card, it's just right for those cards when you need to drop someone a note to let them know you were thinking of them.  The textured Very Vanilla layer was put through the Vintage Wallpaper Embossing Folder in my Big Shot....the perfect touch!

Stamps:  Element of Style, Oval All
Inks:  Chocolate Chip
CS:  Very Vanilla, Chocolate Chip
Misc:  Big Shot, Vintage Wallpaper EF, Large Oval Punch, Scallop Oval Punch, Dimensionals

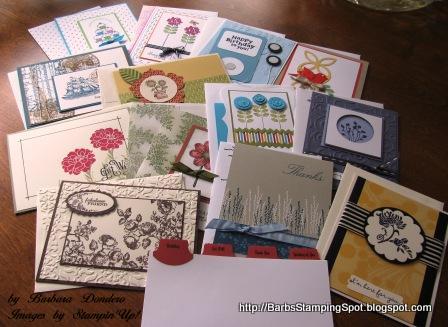
Those are the only two individual cards I will be sharing from the gift tins.  The other cards are all CASEd ideas, and they've already been shared elsewhere online....since I needed 12 different cards for each tin, it was just easier to copy.   Obviously, I cannot take credit for them!  But, here you can see all of them spread around.  This is just one set!  The cards are all lovely (IMHO!!) and I'm very pleased with the finished projects.....come back soon and I'll share the tins.  Oh....the front center items in this group photo show the index cards.  I've matched the tabs in each set to the flowers on the outside of each box/tin.
(This set is for a close friend's birthday....she is receiving a few extra cards in her set.)

Thanks so much for stopping by today!

LinkWithin

Blog Widget by LinkWithin